Consistent slices, faster ticket times, calmer kitchens—when your rolls land on the board with perfect edges and zero crumble, everything downstream gets easier.
This guide breaks down how a maki cutter machine actually performs in real kitchens, what specs matter (and which don’t), how to size capacity, what to watch for on hygiene and safety, and how to calculate payback with simple, realistic numbers. You’ll leave with a clear checklist and a confident next step.
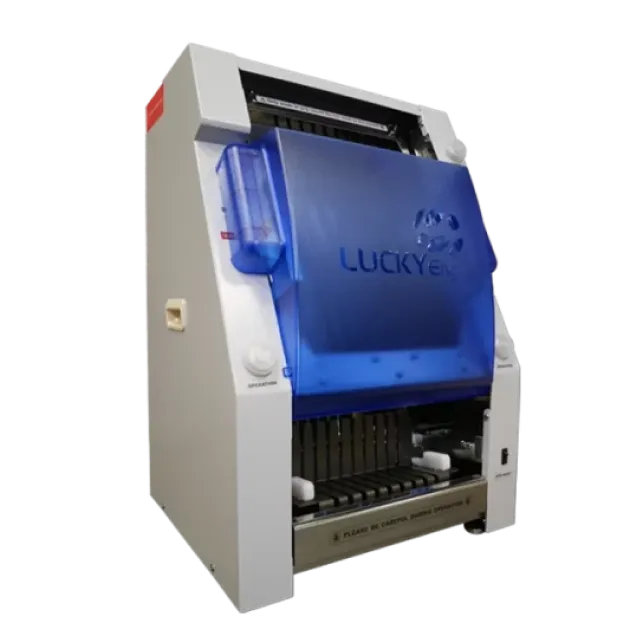
A maki cutter machine automates the final, deceptively tricky step of sushi production: turning finished rolls into uniform pieces with minimal pressure, minimal drag on the nori, and minimal mess. The best units produce clean, repeatable cuts all shift long, regardless of who’s on the station.
High-volume restaurant groups balancing peak-hour throughput with tight labor.
Supermarket sushi counters that need consistent piece counts and tight presentation.
Dark kitchens and delivery-first brands where speed, portion precision, and waste control drive margin.
Training-intensive kitchens that rotate staff and need “day one” consistency.
Single-site operators doing a low number of maki portions per day.
Menus dominated by nigiri or sashimi, with only occasional rolls.
Teams with limited scale ambitions.
If your line regularly produces hosomaki, futomaki, California rolls, and similar items—and you want each tray to look identical while knocking down prep time—automation here is usually a smart first step.
Have questions or need more information about our sushi robots? We’re here to help! Fill out the form below, and our team will get back to you as soon as possible.
The core job is simple: hold a roll, guide a blade through it, and control the cut. But three details separate the winners from the shelf-ware:
Pro tip: Run a quick “soft roll” test during demos—think avocado-heavy California roll. If the machine handles that gracefully, it’ll handle your everyday builds just fine.
Manufacturers often list “pieces per hour” or “rolls per hour.” What matters is the real number for your menu. Use this simple approach to avoid surprises:
Example math (for planning):
| Typical Setting | Rolls/hour | Pieces/roll | Pieces/hour |
| Conservative pace | 350 | 6 | 2,100 |
| Balanced pace | 450 | 6 | 2,700 |
| Fast pace | 450 | 8 | 3,600 |
| Peak push (short bursts) | 600 | 6 | 3,600 |
These numbers are for illustration; your real output depends on operator rhythm, changeovers, and how often you’re switching piece sizes. The point is to anchor capacity to your menu and staffing, not to a brochure headline.
A machine that’s hard to clean will not stay spotless during a Saturday rush. Build hygiene into your criteria from day one.
What to look for:
Sample daily cleaning SOP (5–7 minutes):
Weekly adds: Check edge sharpness, alignment, and drive belts; replace worn gaskets; confirm interlocks.
It’s easy to get dazzled by speed claims. Stay focused on the handful of variables that determine outcomes and ownership cost.
1) Cut Controls
Piece size presets you can switch without tools.
Fine-tuning for edge pieces (first/last slice) so they don’t look stubby.
Gentle mode for soft fillings.
2) Build & Materials
Food-grade resin for contact parts; stainless or powder-coated metal elsewhere.
Non-stick table or replaceable liners.
Replaceable blade assemblies with easy access.
3) Footprint & Power
Countertop footprint roughly the size of a compact microwave or small oven.
Standard single-phase power; low wattage is typical.
Stable feet; optional stand if bench space is tight.
4) Training & Usability
Intuitive controls with minimal buttons.
Clear, laminated quick-start guide for new staff.
Video micro-training for onboarding at shift change.
5) Service & Parts
Local or EU-wide support with spare parts on hand.
Typical consumables list (blades, guards, gaskets) with cycle counts.
Clear blade care schedule and expected replacement cost.
Red flags to avoid:
The Dollars (and Euros): Simple ROI That Finance Will Sign Off
A maki cutter machine earns its keep in three places: labor time, waste reduction, and consistency (fewer remakes, tighter portioning). Use conservative numbers and you’ll still like the payback.
Scenario A: Labor time saved
Scenario B: A smaller operation
Waste reduction
If you spend €800/day on rice + fillings, and cleaner cuts trim waste by 2%, that’s ~€16/day or €4,800/year over 300 days.
Even the smaller shop example can land €8,000–10,000/year in combined benefit (time + waste + remake avoidance), which typically covers an outright purchase or makes leasing a no-brainer. Keep your math transparent, log daily time saved for the first month, and your ROI story becomes bulletproof.
When a Maki Cutter Machine Is the Wrong First Purchase
It’s worth stating: if your bottleneck is rice prep or roll forming, upgrading those upstream steps can outperform any cutting speed gains. If your staff spends 70% of time fixing inconsistent mats or re-rolling loose cylinders, start with a sheeter/seasoner or rolling aids. A cutter multiplies consistency; it doesn’t invent it.
Conclusion: Make Consistency Boring—and Profits Predictable
If your service peaks get hectic, your piece counts vary by shift, or your waste bin tells the story of squashed rolls, a maki cutter machine is a straightforward way to make quality boring—in the best possible sense. Focus on blade quality and path, fast cleaning, realistic throughput, and local support. Use conservative ROI math, track results for the first 30 days, and you’ll have the numbers to justify scale.
Ready to get specific for your menu and volume? Request a short demo with your softest roll recipe, ask for teardown on video, and get a parts list with lead times. Ten minutes of the right questions today will save you months of trial tomorrow.
1) Can one machine handle both hosomaki and futomaki?
Yes—most modern units can handle common diameters with adjustable clamps and piece-size presets. If you cut very large specialty rolls (e.g., dragon rolls), confirm table width and whether the machine supports single-roll specialty cuts without deforming the cylinder.
2) How often should blades be replaced?
It depends on volume and product mix. Many operators budget blade inspection weekly and replacement on a usage cycle (for example, every few hundred rolls). Set a reminder, log replacements, and keep one spare on hand so you’re never down during a rush.
3) Will a maki cutter machine replace hand cutting entirely?
Not necessarily. You’ll still want manual knives for odd sizes, decorative cuts, or unique presentation pieces. The machine covers 80–90% of everyday roll work, freeing skilled hands for tasks where craftsmanship is most visible to guests.
When you lease, “All Inclusive”
service is included. 24/7 support & service. 3 y warranty on all parts!
When you lease, you pay exactly the same fixed fee every month. Easy to budget.
Simple and safe for you to lease or buy a Sushi Robot. 3 y warranty on all parts!